Showing posts with label recipes. Show all posts

Tuesday, April 5, 2011

Friendship Bread


A friend gave me a Friendship Bread start a few weeks ago. I had always heard about them and was excited to see what all the fuss was about. It seemed easy enough to do; you mush a bag for a few days and add in milk, sugar, and flour, then make a really good dessert bread to share with others.

If you do not have a start, you can make the “mother batch” from various recipes. The one that seemed to match my batch the most can be found at Allrecipes.com. On the sixth day you add 1 cup of sugar, 1 cup of milk, and 1 cup of flour to the batch. On the tenth day you bake. First you add in 1 cup of sugar, 1 cup of milk, and 1 cup of flour. Then you take 1 cup of the mixture out and add it to a new bag (do that 4 times), so you can keep a batch and give 3 more away to friends.


Then to what is left in the bowl you add:
  • 1 cup vegetable oil (or 1/2 oil and 1/2 cup applesauce)
  • 1 cup white sugar
  • 1 teaspoon vanilla extract
  • 3 eggs
  • 1/4 cup milk
  • 2 cups all-purpose flour
  • 1 1/2 teaspoons baking powder
  • 1/2 teaspoon baking soda
  • 1/2 teaspoon salt
  • 2 teaspoons ground cinnamon
  • 1 (5 ounce) package instant vanilla pudding mix
 Mix and put in 2 loaf pans. Then bake in a 350* oven for 1 hour.


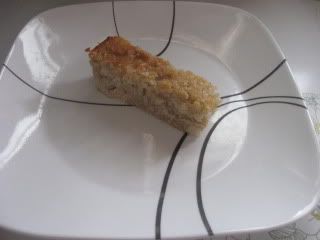
After making it by the book a few times I wanted to experiment with it. I added ½ cup Applesauce instead of all the oil and added 3 peeled and diced apples in place of the vanilla pudding mix.

It was very good, not as sweet as the original but still good. This is more like a cake than a bread. 


I plan to try different variations, like banana and pumpkin, in future batches. I like that this recipe is one that allows you to play around with it.

Making this bread has also added a new book to my library list, Friendship Bread by Darien Gee. It sounds like an interesting story about how a simple starter can bring people together. I loved sharing the starters with friends and encourage you to make a batch to pass along.  

 Have you made Friendship Bread before? What variations have you made? 

Sunday, November 28, 2010

Thanksgiving Leftovers Day 3

Tonight's leftovers are different than typical Turkey Day food. I had a lot of mashed potatoes so I wanted to mix it up and do something other than reheat them. This made me look at what was in my freezer and forced me to be creative with what we had. We usually do grocery shopping on Wednesdays but since that was the day before the holiday, we did not want to face the crowds. This made me have to be even more creative since we had less to choose from.

I decided on mashed potato pancakes with stroganoff and steamed broccoli.

To make the potato pancakes I whisked an egg and added a little flour, then mixed in the leftover mashed potatoes. Form them into patties and fry the in about 2 tbs of oil.

My easy stroganoff was just browned ground beef, 1 can of beef broth, 1 packet of onion soup mix and 3/4 cup sour cream.

I was able to use leftovers again, but my family didn't have to feel like they were still eating the same meal :)

Saturday, November 27, 2010

Use Those Leftovers! Day 2

I love Thanksgiving. The food, the family, the food, the parade, the food, the shopping, the food... ;)

I already posted about Turkey Soup, but if I kept cooking like that I think my family would protest. It also gets really boring eating a turkey dinner each night.

Tonight I made Turkey Chili. This is a good meal because it is cheap even when not using leftovers, but even better when you are! I put in a bit of the turkey meat, beans, peppers, corn, and 2 jars of the tomatoes I canned this summer. I also added in some of the leftover sweet potatoes. It makes the chili more rich, thick, and sweet. It also can be a way to "sneak" in some veggies because they start to fall apart and just make the chili thicker. Even though it uses a lot of the Thanksgiving leftovers, it doesn't feel like you're eating the same meal over and over again.


We also have had turkey sandwiches. That is a perfect "day after Thanksgiving" lunch because it is simple to throw together. If you're more ambitious you can make a "Turkey Salad" instead.

This is only Day 2 of my goal to use up all the leftovers! I'll keep posting the different ways we made a turkey dinner stretch :)

Friday, November 26, 2010

Happy Leftovers day!

I hope that each of you had a wonderful Thanksgiving! Now we're on to my favorite part- the leftovers. Not often can a meal turn into a week of yummy meals for your family, but Thanksgiving gives us more to be thankful for. If you get tired of having a Thanksgiving meal each night then mix it up. Use turkey for stir-fry or fajitas, turn mashed potatoes into potato pancakes, add sweet potatoes to chili.  Really the possibilities are endless. That's why my family did a full Thanksgiving meal even though we were also eating at my in-laws.

One of my favorite things to do is make soup. This meal is practically the most frugal of the all. Cut as much meat off your turkey as you can- but don't throw out that carcass! By making it into soup you can score one more meal, for pennies.

Add the carcass to a big pot of water and boil it for a few hours. Just start it as you get up for Black Friday sales and smell it simmer. If you have a big enough crock pot just set it up and head out the door.  If you have carrot or celery ends add them to the pot for even more flavor.

Then after a few hours turn it into soup. Strain out the bones and you'll be surprised at just how much meat was hiding. Chop up onions, carrots, celery- or even throw in the leftover veggies from yesterday. Add the veggies and meat back to the broth and continue to simmer. You can add some cooked rice or pasta before serving.

Soup is already a frugal meal, but using everything from your Thanksgiving turkey can help keep to your budget this holiday season.

Tuesday, July 20, 2010

Use that Garden!

Since I posted an entry about how much gardening can save in the long run, I wanted to show one way that I am using that garden to the fullest.

Since I am only a few weeks away from having baby #3, preparing for his arrival is something that I am incorporating into my daily routines so that I don't feel overwhelmed by the process.

One dish that my family loves is Stuffed Bell Peppers. It can be expensive (bell peppers are around $1 each at the sale price) and time consuming so it isn't a meal that we make weekly.

Everyone makes theirs different, so if you have a tried and true recipe that you love follow that. I have strayed from my mother's recipe to help incorporate what we were growing and what we had available in the house.

For this recipe I used:
1 lb ground beef (though beans can be substituted)
14 bell peppers
6-7 ripe tomatoes
3/4 cup corn
1 cup of brown rice (precooked measurement)
2 cups of water (to cook the rice)
salt, pepper, and basil
1/2 a diced onion
2-3 cloves of garlic
Mozzarella cheese

Photobucket

First I got everything ready. I put a pan on the stove and started browning the ground beef. I put another pan on the stove with water to get it boiling. A lot of getting this done is multitasking, so do it in a way that works well for you. I also started cooking the rice in the microwave. I washed the many peppers we picked from the garden. Then I cut them in half, cleaned them out into a bowl (the ice cream one in the picture). I rinsed them again.

Since by then the water was boiling, I put the peppers in for a few minutes to blanch them. While they were blanching, I drained the ground beef and added the diced onion, garlic, corn, and seasonings to the pan. Next, I got the other set of bell peppers ready to go in the boiling water.

Photobucket

Then I put each pepper in a baking dish that was sprayed with Pam. They were able to sit and wait for me to finish the other steps at this point.

Photobucket

Next I grabbed these tomatoes and washed them. I put them into the boiling water that I used for the peppers and filled one side of the sink with cold water. This is to help get their skins loosened so I could easily peel the skin off the tomatoes.

Photobucket

After they were peeled I diced them and added them to the ground beef mixture. I also added the cooked rice to the mixture at this time.

Photobucket

At this point I preheated the oven to 375*. Then I set up an assembly line at the table to put all of the peppers together. I put a bit of the mixture into each pepper. I added more to any that seemed like they could hold more than the scoop I put in. When they were all filled I topped with cheese.

Photobucket
Photobucket

Bake for 30 minutes (or longer if you like the cheese more crispy on the top) and then enjoy!

Photobucket

My husband and I each had 3 peppers and the kids each had 1.

Photobucket

I took the leftovers and put them into freezer bags. I laid the bags flat so that they wouldn't fall apart before freezing. We had enough for 3 more meals out of this- 6 in two of them and 8 in the third.

This meal cost next to nothing even if it was for one meal. We had to spend nothing on the peppers or the tomatoes because they came from the garden. The corn was not even half a bag that was on sale for 88 cents. The onion was not a whole onion, but instead was part of one we cut up and froze in an individual serving. The garlic was from a bulk jar that is kept in the fridge. The rice was only 1 cup out of a 16 oz package that was a little over a $1. The ground beef was the most expensive part at about $2 for the pound, and that can be substituted for beans to save money or to make it a vegetarian dish. The seasonings were minimal.

Estimated cost, figuring high:
Peppers $0
Tomatoes $0
Corn $0.44
Onion $0.50
Garlic $0.50
Rice $0.25
Ground beef $2
Seasonings $0.10

Total $3.79

Even if I round it up to being $4, since I was able to make 4 meals out of it my family was able to eat for $1 per meal total. This beats any $1 menu and I can be happy with what my family is eating too.
Web Statistics