Showing posts with label freezer cooking. Show all posts

Monday, February 4, 2013

Menu Monday: More Crock Pot kits


I'm making my way through my freezer meals and am finding out that I am not a big fan of the casseroles. Aside from Lasagna, they turn out mushy and the flavor is off. I also found that the meatballs I made 2 weeks ago were not a hit. I like adding carrots for taco meat and sloppy joes, but it does change the flavor significantly for other dishes.


So this week I focused on more Crock Pot kits. Some changes from before:
  • I peeled the veggies. Although the taste was fine last time, the peels got dark and looked unappealing.
  • I did not add the broccoli and Alfredo sauce to the bag. It made it hard to fit in the crock pot once frozen, and the broccoli overcooked. So this time I'll add that a few minutes before serving. 
  • I did not lay the bags completely flat. Sure it helps for storage, but adding a square shape to a round crock pot, then a lid, is annoying. 
I've even gotten my husband on board with the freezer cooking. He made a new set of meatballs, hamburgers, and lots of ground beef cooked for future meals. It was nice spending that time working side by side :)


Monday, January 28, 2013

Menu Monday: January Round Up + Bonus Freezer Recipe


This Menu Monday is kind of a January Round Up! I wasn't able to do much freezer cooking this week. I had Scouting events, Teacher conferences, Disney on Ice, etc.

BUT having so many stocked meals in my freezer meant that even though I was busy, we always had something ready to make.

A lot of the meals I tried this month were new for me, but all worked out really well!

Some favorites:

Broccoli Chicken Alfredo {This was so easy, but looks a little... strange when it's done. It tastes great, but if you have kids who don't like green food it may be one to avoid- or to try with Cauliflower instead!}

Sloppy Joes + Taco Meat {I had never added carrots to my ground beef to stretch it before, but was SO impressed by it. It didn't make it less meaty, just gave it a bit more sweetness and my kids and husband didn't complain once}

Lasagna {Leftover lasagna is the best ever, so freezer lasagna is like leftover lasagna ;) }

Some that may need work:

Enchiladas {I put way too many in one pan. I should have had 2 pans for this many. It took a long time to bake, and though it tasted good, it could have been better}

Mexican Lasagna {I thought the meat would go a lot further in this, but it didn't. It made a big pan, but not the 2 I planned on it making. I think I need to add beans or rice to stretch it further}


I DID get to do some freezer cooking this week. We had a 2 hour delay for freezing temps, but I didn't sleep in much. I surprised the kids with breakfast, and made these at the same time.


For this I used 12 eggs and 4 slices of ham. I beat the eggs and cubed the ham.

Preheat the oven to 350*
Line the muffin pan with liners (saves time in scrubbing the pan!)
Pour some of the egg into each liner.
Add cubed ham.

Bake for 15-20 minutes. Cool on a rack, then peel the liner off before putting in a freezer bag (to avoid the hassle of doing that later).

They heat in the microwave for 1-1.5 minutes.

I think next time I'll add milk to the eggs when beating them (or cheese) and fill the liners more than halfway (it's such a tiny little portion they way I made it, but great for a breakfast sandwich!).


Monday, January 21, 2013

Menu Monday: More with Freezer Cooking + Shopping Lists!

I've been on a real Freezer Cooking kick lately. Once I started, I couldn't go back to wondering what in the heck I was going to make for dinner after teaching all day and wanting to do anything BUT cook. I also was over spending money we really didn't have on fast food or easy foods just to get by. Freezer cooking has worked out so well for us, and the best thing is that I'm NOT following someone else's version by the book. I'm doing what works well for me and building up my freezer a few meals at a time.

I promised weeks before that I would include shopping lists for the meals I made for the freezer, so here are the lists for Menu Monday One and Menu Monday Two.

Onto Menu Monday Three (click that for the shopping list).

This week I bought a 10lb chub of Ground Beef. Thanks to the other meals, we hadn't had it a lot, so I took this chance to make up a lot of the meals that we liked but didn't have. Only rather than just make some for the week, I doubled each recipe and made enough to have it twice (with hopefully some leftovers for the Husband's lunches).


This week I stocked the freezer with 2 Meatloaves, 2 batches of Meatballs, 1 batch of Sloppy Joes (we ate the 2nd batch the night I did the cooking ;) ), and 3 batches of Taco Meat to go onto other meals (2 are going to a Mexican Lasagna I will make for the next round of Freezer Cooking).


Meatloaf
In a bowl add:
a little over 2lbs of ground beef
2 cups of shredded carrots
1 diced onion
2 eggs (beaten)
1 cup of water
2 cups of stuffing mix.
{These are estimated amounts, so you can add what you want and make it your own.}

Form into 2 loaves and put in freezer bags. To cook, preheat the oven to 350 and cook until done all the way through. This can vary depending on oven temp and whether it was defrosted before baking. Top with Barbecue sauce for the last 20 minutes or so.

Meatballs
Prepare the same way as the Meatloaf above, only shape into 1-2 inch balls. Place flat in a freezer bag until completely frozen (to keep them from sticking).

Sloppy Joes
Brown a little over 2lbs of ground beef with 1 diced onion and 2 cups of shredded carrots. Drain. Add a can of Sloppy Joe mix. Serve on buns (this made enough for my family to eat their fill and freeze enough for another meal).

Taco Meat
Brown a little over 2lbs of ground beef with 1 diced onion and 2 cups of shredded carrots (sensing a theme here?). Drain. Add enough taco seasoning (either premade or homemade) for 2 meals, adding water if needed.
{I will end up adding black beans and red beans to this, or possibly lentils}


Monday, January 14, 2013

Menu Monday: Freezer Food EDIT: Now with Shopping List!


Last week for Menu Monday I focused on freezing food for the Crock Pot. This time I'm freezing more oven-ready meals. I made fewer with the ingredients I had (I made 10 last week!), but I'm taking baby steps in having a freezer full of easy to make, and better for me meals.


This week I've made:


1. 1 Pan of Chicken Enchiladas
2. 1 Pan of Lasagna
3. 2 batches of  Pizza Dough
4. 1 Batch of Chocolate Chip Oatmeal Muffins- These did not last in the freezer.. because my kids/husband got to them!

1. The first step was to cook the rest of the chicken (that didn't get bagged for a crockpot meal). After I cooked it on low for a day, I shredded it and portioned it out for meals/lunches. About 4lbs of boneless, skinless chicken breast was used.

I used about 1lb for enchiladas. I mixed the rest of the can of rotel with the chicken, added taco seasoning, frozen corn, 1/2 cup of cheese and 1 cup of rice (precooked measurement). I rolled the mixture into tortillas and will top with a can of enchilada sauce and more cheese when I put it in the oven (I didn't want the tortillas to get too mushy).

I used another lb for chicken pot pie (not pictured). I made this the day I did my freezer cooking because it was easy and would bake while I worked on other meals (I have to do my freezer cooking in the evening/weekend since I'm at work during the day). This is an easy meal, I just mix the chicken with leftover or canned veggies and a can of cream of chicken soup. I added the broth from cooking the chicken and topped with a baking mix topping.

I froze another lb to use when needed.

The last lb I kept in the fridge and brought it for lunch as a salad topping. Salad, cooked chicken, and half an avocado made for a really great lunch!

2. This is a meatless lasagna. I cooked the pasta and sauce (I added a bag of shredded zucchini to the sauce), and mixed a cup of cottage cheese with one egg and basil/oregano. Then just layer the ingredients I did not bake this prior to putting it in the freezer!

3. & 4. I used Money Saving Mom's recipe for both of these. The muffins were such a hit that none made it to the freezer!

My freezer is getting full! It has been so worth the extra prep, because dinners have been easy, yummy, cheaper, and better for us!


If you wanted a shopping list- here it is!.

Monday, January 7, 2013

Menu Monday: Crock Pot Edition EDIT Now with shopping lists!

Welcome to the first Menu Monday post of the year! I could lie and say this will be a list of what we're going to eat the day we'll eat it, but that's not how it works at my house. I buy groceries every 2 weeks (that's our pay cycle and the fewer times we shop, the less I spend!) and usually shop at Aldi, though I'll hit up Kroger for meat. Once upon a time I went to many stores and coupon shopped and did amazingly well. I just feel like I lack the time to watch sales, shop multiple times, and energy to do it well. So this works for me. 

I shop, plan out 14 dinners, food for lunches, and food to grab on the go for breakfast. I plan to use my freezer more this year, since we have had too many convenience foods since I started working. I plan to do this in stages (there's no way I can cook for a month in a weekend), so this week was dedicated to Crock Pot cooking (well preparing for the crock pot).  

So basically I had to turn this (click here for the shopping list):


Into meals for my family.


I set up a work station and started chopping veggies. I cut up celery, carrots, sweet potatoes, onions (red and white) and white potatoes. I also had frozen broccoli and corn to add to the bags.

Then I filled the bags based on what meals I was making. Most got all the veggies, but some (like Chicken Broccoli Alfredo) didn't. 

Once I chose the veggies for each meal, I washed the cutting board and got out the one for meat. I cut up chicken breasts and added them to the bags of Alfredo, White Chili, Teriyaki, and Angel Hair Pasta. I washed the board and cut up a big roast for both roast beef and beef stew. I bagged pork chops and ribs, but I didn't add anything to them. Some add a barbecue mixture but I like to cook mine before adding sauce. I'm not a fan of a lot of sauce so I let my family add what they want after it's cooked. 

Most of these meals are complete enough to put in a crock pot and eat at the end of the day. Others have more steps, and I'll write them on the bag. The good thing to this is that it's more of a method than a recipe. If you don't like an ingredient, you don't have to add it. If you want to add something, you can. I fyou have seasonal produce to use, add it. Figure out what works for you!


The ten meals in my freezer now are:


  • Chicken Alfredo (Chicken Breasts, Broccoli, and Alfredo sauce)
  • White Chicken Chili (Chicken Breasts, sweet potatoes, carrots, celery, corn, onion, garlic, taco seasoning, half a can of rotel) I have to add Chicken Broth and beans (I cook dried beans and freeze so these are already in the freezer) when cooking. 
  • Sweet Potato Chili (Sweet potatoes, carrots, corn, celery, onions, garlic) just add a can of diced tomatoes, beans, and water when cooking.
  • Beef Stew (beef, carrots, potatoes, sweet potatoes, celery, onion). Just add water and seasonings when cooking.
  • Roast Beef (beef roast, carrots, potatoes, onion, onion soup mix). Just add water and seasonings when cooking.
  • Chicken Teriyaki  (Chicken, broccoli, carrots, celery, Teriyaki sauce, garlic) I just serve over rice. 
  • Chicken Angel Hair (chicken, red onion). This one is less of a crockpot meal, but it was easy to cut up the chicken at the same time. This is made using angel hair pasta, Italian dressing, and grape tomatoes.
  • Ribs. Just add BBQ and water when cooking. This usually has sides I make separately like baked beans and salad.
  • Pork Chops. Again this is cooked on it's own. I can add BBQ or any seasonings depending on how I want to have it that week. I cook the sides separately as well. I like potatoes (mashed or fried) and veggies. 
  • Veggie Soup. (All the veggies that were left). I add tomatoes, broth, and seasonings. I love to make a crusty bread to serve this with. It doesn't feel like it was what was left over :) 

I love knowing that I have dinner ready to throw in the crock pot for those busy days, and being able to control what goes in each meal.

You can follow me on Pinterest to see what recipes I've filed away for future Menu Mondays!

Wednesday, June 8, 2011

Strawberries!

I got to go to a local orchard and pick strawberries today! They were $1.50 a pound and so yummy. In my area, that price is better than most grocery sales plus we got to make it a family day. The kids had so much fun picking berries and I love to do anything that reminds them of where their food comes from.


We picked 10lbs of berries and spent $15. I let the kids eat until they were stuffed, then I set to wrk on the rest.


I work on an assembly line when I do any bulk cooking or freezing. It is organized and efficient. I washed the berries, cut the tops off, then cut them up. The best berries went in a bowl in the fridge. The rest were put on cookie sheets and put in the freezer. Once frozen, they are transferred to a freezer bag. They make wonderful smoothies and are cheaper than store bought!

Don't toss the tops of those berries! Wash them really well, then put them on the stove with a 2 to 1 ratio of sugar and water. For this batch I put 4 cups of water and 2 cups of sugar.


Bring to a boil, then cook until the berries start to lose color. Strain the berries out and return the liquid to the stove. Reduce it as uch as desired.


Cool and store in the fridge.


Even though the "sauce": was thin, it made for an amazing ice cream topping. Add it to carbonated water for a fruity soda or add some to regular cola to make it strawberry.


It's got fruit, so this is healthfood, right?

Monday, March 21, 2011

Cooking With Dried Beans

I tried to switch to a mostly vegetarian diet a year ago, but once I got pregnant the meat cravings won. I started using beans in my recipes as meat replacements, and still enjoy using them now. Beans are a lot cheaper than meat, and using dried beans can save even more money.

There are a few ways to prepare dried beans. You could just cook them in the dish you're making (which can be time consuming) or prepare them in advance. There are also a couple ways to cook them in advance, you could do an overnight soak then cook all day in a crockpot or do a rapid soak and simmer them on the stove. I usually choose the crock pot route, but my big one broke and the small one doesn't hold enough. So I will show you the stove top method today.

Start by rinsing your beans. I like to mix red and black beans. They add a hearty flavor in chili, rice dishes, and soups. This will make a lot of beans (they get bigger as they cook), but that's the point. I like the cook once, use many times method. I can have these ready to go so they are as convenient as canned but less expensive.


Add them to a pot of cold water (pick out any skins or bad looking beans)


Bring to a rolling boil and let them boil for 10 minutes.


Remove from heat, cover and let it sit for at least an hour.


Drain the beans. You can see how they have grown in size! The red beans tend to look a bit dingy when cooked with black beans, but they still taste good.


Add the beans to a pot of hot water. I like to put a generous spoonful of garlic at this point.


Bring to a boil. Cover partly with the lid, reduce heat and let it simmer for 2 1/2 hours. This is a good thing to do on a cleaning day since you don't really have to babysit it. Just set a timer for each step and move onto other jobs.


Drain the beans and set up your workstation. I labeled quart-sized freezer bags and got a measuring cup out.


I scoop out about 2 cups per bag. I use one bag per meal.


I roll them to get the air out.


Then lay flat to store.


I wound up with 6 bags (12 cups) of beans. This will make at least 6 meals (more if I reuse leftovers). The beans were a little over $2, so this was a little over 30 cents per meal and just as easy as using a can. When I used them, I can either pull them out of the freezer and let them defrost in the fridge or just add them directly to what I'm making.

Using dried beans has just become a regular routine for me. When I start to get low, I make another batch. I like having them on hand to make quick meals. 

Thursday, August 5, 2010

Freezer Cooking Day!

After spending more than I would have liked to spend on groceries, I am making the most of it and kicking off a freezer cooking day today :D The good thing is that if all goes according to plan we'll be eating well once I deliver. So extra expense now will give us a chance to relax and enjoy the baby later.

I hope to make a breakdown of what we spent and how many meals it will mean for us later.

Tuesday, July 20, 2010

Use that Garden!

Since I posted an entry about how much gardening can save in the long run, I wanted to show one way that I am using that garden to the fullest.

Since I am only a few weeks away from having baby #3, preparing for his arrival is something that I am incorporating into my daily routines so that I don't feel overwhelmed by the process.

One dish that my family loves is Stuffed Bell Peppers. It can be expensive (bell peppers are around $1 each at the sale price) and time consuming so it isn't a meal that we make weekly.

Everyone makes theirs different, so if you have a tried and true recipe that you love follow that. I have strayed from my mother's recipe to help incorporate what we were growing and what we had available in the house.

For this recipe I used:
1 lb ground beef (though beans can be substituted)
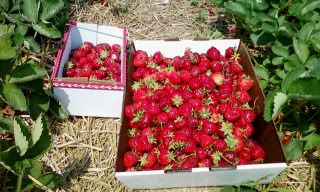
14 bell peppers
6-7 ripe tomatoes
3/4 cup corn
1 cup of brown rice (precooked measurement)
2 cups of water (to cook the rice)
salt, pepper, and basil
1/2 a diced onion
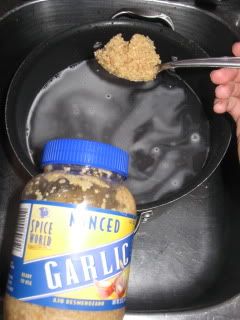
2-3 cloves of garlic
Mozzarella cheese

Photobucket

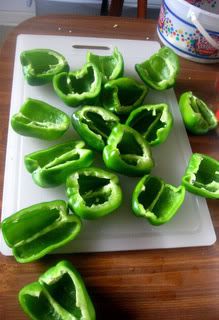
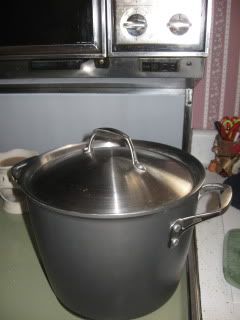
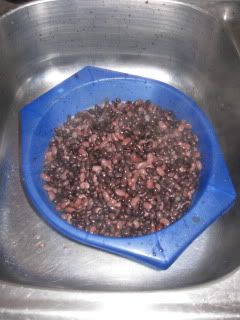
First I got everything ready. I put a pan on the stove and started browning the ground beef. I put another pan on the stove with water to get it boiling. A lot of getting this done is multitasking, so do it in a way that works well for you. I also started cooking the rice in the microwave. I washed the many peppers we picked from the garden. Then I cut them in half, cleaned them out into a bowl (the ice cream one in the picture). I rinsed them again.

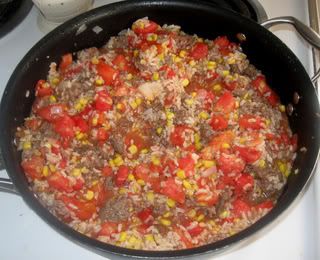
Since by then the water was boiling, I put the peppers in for a few minutes to blanch them. While they were blanching, I drained the ground beef and added the diced onion, garlic, corn, and seasonings to the pan. Next, I got the other set of bell peppers ready to go in the boiling water.

Photobucket

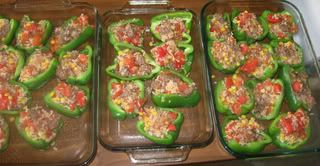
Then I put each pepper in a baking dish that was sprayed with Pam. They were able to sit and wait for me to finish the other steps at this point.

Photobucket

Next I grabbed these tomatoes and washed them. I put them into the boiling water that I used for the peppers and filled one side of the sink with cold water. This is to help get their skins loosened so I could easily peel the skin off the tomatoes.

Photobucket

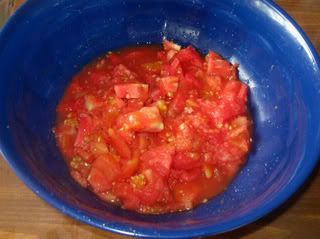
After they were peeled I diced them and added them to the ground beef mixture. I also added the cooked rice to the mixture at this time.

Photobucket

At this point I preheated the oven to 375*. Then I set up an assembly line at the table to put all of the peppers together. I put a bit of the mixture into each pepper. I added more to any that seemed like they could hold more than the scoop I put in. When they were all filled I topped with cheese.

Photobucket
Photobucket

Bake for 30 minutes (or longer if you like the cheese more crispy on the top) and then enjoy!

Photobucket

My husband and I each had 3 peppers and the kids each had 1.

Photobucket

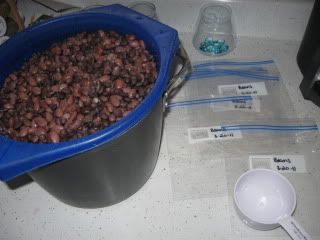
I took the leftovers and put them into freezer bags. I laid the bags flat so that they wouldn't fall apart before freezing. We had enough for 3 more meals out of this- 6 in two of them and 8 in the third.

This meal cost next to nothing even if it was for one meal. We had to spend nothing on the peppers or the tomatoes because they came from the garden. The corn was not even half a bag that was on sale for 88 cents. The onion was not a whole onion, but instead was part of one we cut up and froze in an individual serving. The garlic was from a bulk jar that is kept in the fridge. The rice was only 1 cup out of a 16 oz package that was a little over a $1. The ground beef was the most expensive part at about $2 for the pound, and that can be substituted for beans to save money or to make it a vegetarian dish. The seasonings were minimal.

Estimated cost, figuring high:
Peppers $0
Tomatoes $0
Corn $0.44
Onion $0.50
Garlic $0.50
Rice $0.25
Ground beef $2
Seasonings $0.10

Total $3.79

Even if I round it up to being $4, since I was able to make 4 meals out of it my family was able to eat for $1 per meal total. This beats any $1 menu and I can be happy with what my family is eating too.
Web Statistics