Showing posts with label crafty mama. Show all posts

Friday, February 15, 2013

Fashion Friday: T-Shirt Necklace

I have a history with t-shirts. I've had some wins (and many fails) when it comes to repurposing them. The T-shirt necklace was something I loved but could never get quite right. Until now.


I had many shirts in my yard sale box that haven't sold. I've tried to sell them 3 times, and if someone won't buy my shirt for 25 cents, I don't think it'll ever sell. So I thought I could just play around with them and be out nothing.

I cut the arms and neck off (just a horizontal line cutting off the upper part of the shirt.

I then cut the shirt into strips and stretched them out.

I gathered the ends and sewed a couple stitches to hold them still.

I divided into thirds and braided about 3/4s of the material I had.

I cut the remaining ends in half (to make it less chunky) then gathered together the ends.

I used a rubberband to hold them still and cut just above the band. I used a hot glue gun and glued the ends together.

I cut the end shirt sleeve off and used that to wrap around both ends and trimmed it to fit.


I was able to make one for my daughter too and have more material play around with. I'd say that's worth more than a quarter to me :)

Monday, February 11, 2013

Painting Projects: Coffee

I plan to have a Coffee themed kitchen (when we finally do something about the wallpaper and carpet (yes, carpet) the previous owners put in.

But since I can't do anything about it yet, I've been working on collecting things so when I do, it can be put together quickly.

I painted this yesterday and really liked it:


Friday, December 28, 2012

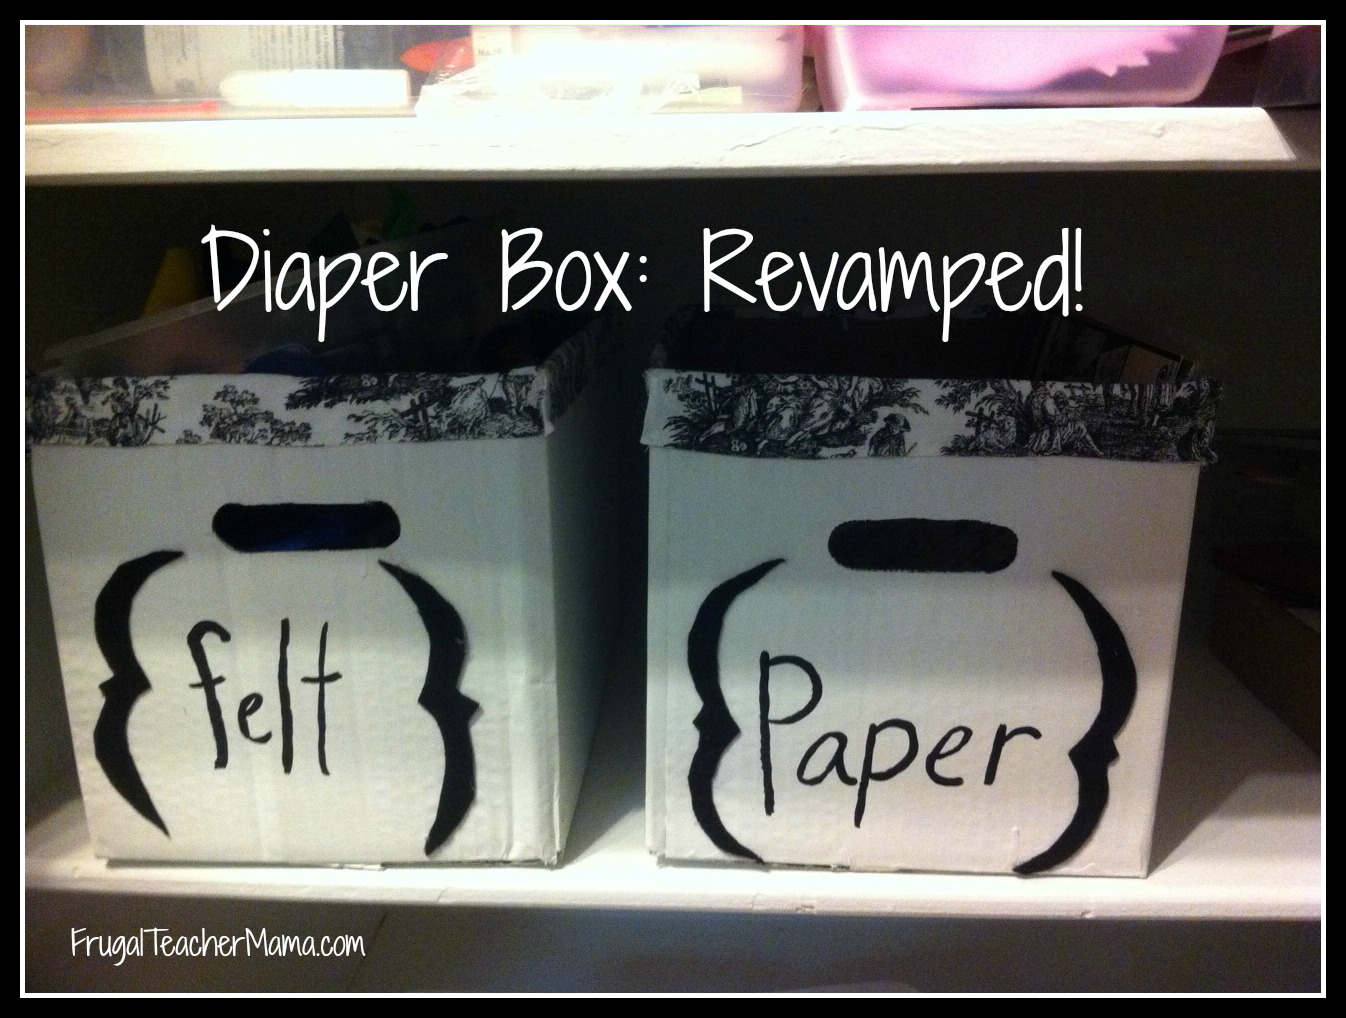
Diaper Box: Revamped!


I can't claim to have thought of this idea. I've seen many all over Pinterest. There are a lot of options for a diaper box. You can glue paper all over it, paint it, glue fabric on it, sew liners, etc. Really if you look you'll probably find a way to revamp it to suit your needs.


That's what I did with this. I don't possess sewing skills outside a basic blanket stitch, so sewing was out.

I don't have a lot of fabric on hand (reason: I can't sew), so even gluing it all over a box was out.

The only wrapping paper I have on hand right now is Christmas, so that was out.

I did have leftover paint from when my husband painted my workspace, scrap fabric from recovering chairs years and years (and years) ago, a glue gun, and an idea.


Start with a diaper (or other) box. Cut the flaps off the top of the box (and out of the handle if your box has them).


Start painting. I painted all over the outside (even the bottom) of the box.


Since the box is glossy, you really need to let the coats dry to cover as much of the print as you can. So add a coat, go read for a bit, then come back and add another.


Once the box is dry, measure your fabric against it. I made mine about 3 inches wide and the length of the box (2 shorter, 2 longer).


Glue a hem for the fabric (reason: I can't sew). I glued a hem by gluing a little bit, folding the fabric over, then continuing. If you can sew, sewing a hem would work too.


I wanted it to stand out a bit more, even after adding the fabric. I cut these freehand (really? can't tell!) and glued them onto the box.


I decided to paint a label for the box I also did these freehand. I know. I thought so too.

Then you have some boxes re-purposed for your needs :) I plan to do at least one more for these shelves, or if my 2 year old's potty training goes the way it has been: for every shelf in the house. It's a long battle.

Saturday, December 22, 2012

Christmas Shirt Ideas

I posted before about having a Pinterest party with my friends, it was really fun to get some cute projects done! After that party we decided that we wanted to make another shirt for Christmas. So at the next get-together we got to work.

The first up is a Ribbon Tree shirt:


This shirt is really easy to make but I think the simplicity makes it really pretty. You can do this with ribbon you already have, or buy some for it. Measure and cut the length (this really isn't exact, you can eyeball it and smaller shirts will have a smaller tree). 

Once all the ribbon is cut, you'll need to singe the ends with a lighter so they don't fray. Just be careful not to catch the ribbon on fire :) 
Then I hot glued the ribbon one piece at a time until the tree was done.

It seems like boys don't have as many cute options, so when a friend suggested this, I was so excited.

This is the Christmas Tree shirt:


We just drew a stencil by hand for the car, tree, and tires. You can make your car any color, but this camo was too cute.

Once all the pieces are cut out, hot glue them to the shirt. I used Tacky glue the first time and after washing everything came off. I'm hoping for better results with hot glue.

I would handwash these just to be safe.

See the shirts in action while the kids met the big guy:


Thursday, December 20, 2012

Using Pinterest

I feel like I get so many ideas from Pinterest, but sometimes I get too many. I had a Pinterest Pin-it Party before, and yesterday I used many Pinterest ideas with our Girl Scout Troops!


So many cute things in one party and they really weren't that expensive!

Here are the links to the pins in case you want to try them out:
Has Pinterest inspired you this holiday season? 


Wednesday, December 19, 2012

Felt Bow Ties: Tutorial


I've been really good about finding different things to make my daughter, but I've had a harder time figuring out what to make my son. I can't believe I didn't think of this sooner since I love bow ties :) 

These are really thrown together (I had a spark of inspiration 20 minutes before his school Christmas program), so play around with this idea. I plan to make some nonfelt versions and really wish I thought of this in time to ship them to my nephews! 

Materials Needed:
Felt
Scissors
Needle and thread
Hot glue gun
Alligator clip (or pin, if you'd rather pin it on). 


1. Cut a rectangle out to be the bow. You can make it bigger or smaller, it's not really an exact measurement.  I'd start with 5" by 3" and trim to how you want it to look. Cut a smaller strip to go around the middle (about 1" by 3".

2. Scrunch it to make a bow shape.

3. Sew a few stitches just to hold it in place so gluing is easier.

4.  Wrap the smaller strip over the area you just sewed. Use a glue gun to put it on.

5. Wrap the strip completely around and trim if necessary. Get alligator clip.

6. Glue on the alligator clip. You may have to hold it open and together as it dries so it won't stick together.

Then you just clip it onto your shirt or it can even be a hairbow if you want it to :) He loved it and I loved that I could make something for him :)


Wednesday, December 12, 2012

A gift for Coffee Lovers!

I'm a Coffeemate Brew Crew member and was given the idea to make my own coaster using a ceramic tile and a sharpie. Since I had both on hand after making photo coasters, I was excited to try this!


I think it turned out really cute, but even after letting it dry it smeared a bit. I googled to see if it would be okay after baking, but someone beat me to testing it and said it smeared then too. :(

So my next step was to try an acrylic sealant. It seemed to hold up a lot better using that though it affected the look a little.

I love this idea since I am working on a coffee-themed kitchen! I love the Coffeemate White Chocolate Caramel Latte (a whole latte! ;) ) so adding this little touch to my kitchen is fun and will be a great addition.

Saturday, November 17, 2012

Fun with Felt

I used to make felt playsets and hair clips, but got busy and just stopped. After seeing some adorable felt owls on pinterest, I had to try to make one.


Completely freehand and I think he's adorable. I can't wait to make more :)


Saturday, December 10, 2011

Pinterest + Scarf Attempt

Pinterest has been both a blessing and a curse. It shows me so many creative ideas that make me wish I could just close myself up in a craftroom and work forever making cute things. It has also showed me that my drive doesn't always match my talent.

There may have been a recent incident with an old tshirt and a pair of scissors. I won't get into the gory details, but it ended with the nickname "Lawnmower Scarf" and got many... constructive comments from my friends. And less than constructive comments from my husband and sister.

I almost banned myself from the scissors, but I wanted to make some scarves out of shirts that have either gotten holes or that I'm too small for now (victory dance!). One of the shirts that ended in my craft pile was a favorite. When I saw the hole in it, I almost cried. Then I saw this tutorial linked on Pinterest and thought that it looked easy enough that maybe I wouldn't mess it up. Maybe.

You just have to cut under the sleeves and above the hem, then pull it. Seemed easy enough- and the result was this:


[Forgive the goofy face- I was just happy it worked!]

I am in love. I loved the color and texture of this shirt, and now I can wear it all the time with other outfits and in different ways. It literally turned something I would have trashed into something I can really use!

So even if Pinterest and I have our issues, I think overall it is a healthy relationship :) Are you on Pinterest? Follow me and I can follow you for more ideas! :)

Thursday, December 8, 2011

Recycled Christmas Crafts

I am a Coffee-Mate addict. I feel safe admitting that here, among friends. I love all the seasonal flavors that they have (Brown Maple Sugar is so good!) but my fall backs are Hazelnut and Vanilla Caramel. I usually just toss the containers out with the recycling when I'm done, but I was inspired to do something else instead!


I made some holiday buddies out of them! :) I spray painted the penguin black before using acrylic paint to paint his features, but I found that putting the paint on the inside worked better, so I just poured acrylic paint into the Santa and snowman ones then added the features.

This would be a fun project for the kids too and make a nice decoration you can use for years to come!

Tuesday, May 17, 2011

A Mother Poem


Some houses try to hide the fact that children shelter there,
Ours boasts of it quite openly, the signs are everywhere,
For smears are on the windows, little smudges on the door;
I should apologize, I guess, for toys strewn on the floor.
But I sat down with the children and we played and laughed and read,
And if the windows do not shine, their eyes will shine instead.
And when at times I'm forced to choose the one job or the other,
I want to be a housewife, but first I'll be a mother.


A friend shared this with me and  cried reading it. It really helped me accept that my house will always have toys out of toy boxes and that the moment I get a mirror clean will be the moment that my kids start to make silly faces in it :) 

I wanted to display it, so I printed the poem with room for my kids' hand prints. It is simple, but I really love how it turned out. I put it in our entrance way. It gives a kind of warning for what is to come.

Saturday, April 9, 2011

Getting Crafty

Do you consider yourself a crafty person? I think I am, to an extent, but there is so much I wish I knew how to do. Smart shopping is one way to keep in a budget, but creating something from the scraps that are around the house is just as useful. I have dreams of being so good at it that outgrown clothing is made into doll clothing or bags, that yarn is turned into a cute hat or scarf, and that I can make a gorgeous dress out of my curtains- okay maybe not that last part. I'll leave that to Scarlett.

Last night I got to have an introduction to knitting and I loved it. I think I am finally getting the hang of "casting on" but am a little stumped at the next step. Plus my baby is in the grabby stage so my practice only happens during naps. I really want to learn though, so I plan to keep at it. I have heard the crocheting is easier, but I have needles right now so I'm trying knitting first.

My next goal is to learn to use my sewing machine (if I can find all the parts that were misplaced in the move- label everything when you move). A friend made the most adorable pillowcase dresses for her daughter and her daughter's doll and now those are on my list of things to learn before my daughter outgrows matching her doll :)

I do create some fun things, even if I'm not gifted at knitting or sewing. My specialty has been felt.


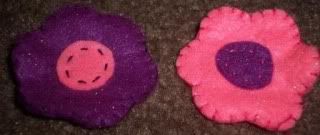
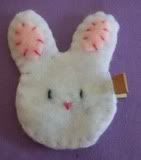
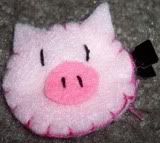
These are hair clips I made for my daughter:

They were really inexpensive too. You just need felt, alligator clips, tacky glue, and embroidery floss. I cut a pattern out of cardboard, then traced it onto the felt. Then cut 2 identical shapes. Slip the top of the alligator clip between the two pieces and put a little tacky glue on to hold it, then sew the side with a blanket stitch. I have plans to make a few more clips, so I'll post a tutorial later.


What Crafty things do you do? Is there anything you want to learn?

Thursday, March 17, 2011

Weekly Allowances + Etching tutorial.

After being asked for money to buy necklaces and other candy from a school fundraiser, for the money for a doll stroller, for a trip to Lego Land- I wanted to find a way to help my kids save their own money for the things they wanted but also learn more than "I get $5 each week." We have tried to do an allowance before, but it was hard to keep track of, we would end up buying the things the kids wanted anyway, and then after a couple weeks it was forgotten.


We are going to try a new approach, marble jars. At the start of the week they will have 20 marbles in their jar (each is worth 25 cents, so $5 total). If they leave lights on after being reminded to turn them off, leave their rooms a mess or say they have put their laundry away when they haven't- they will lose marbles.

I honestly think the first couple weeks they will have far less than $5 in an allowance. Bad habits are hard to break, and they have gotten used to getting away with things since we have been preoccupied with a baby in the house and moving.


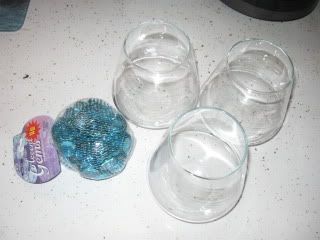
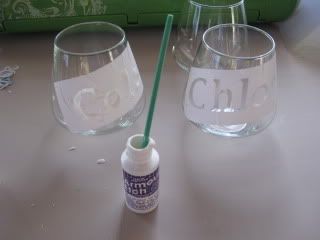
Making the jars was a fun project for me to do. I bought the jars and marbles at Dollar tree, used my Cricut (a present from my husband) with the leftover vinyl from my Houseparty, and Armour etching cream. It took under an hour to make it and most of that was deciding how to place their names and waiting for the cream to activate.


I started by cutting out their names in vinyl and placed them on the glass. It was a little difficult to get the vinyl on because the glasses were angled. A flat glass would be a lot easier.


Be generous with the cream- and protect your hands and eyes! Let it set for at least 15 minutes. 5 was not enough the last time I did this.


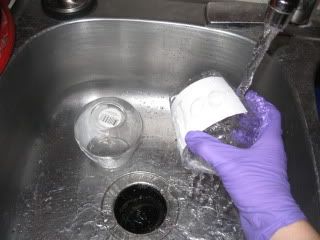
Then rinse it off and pull off the vinyl. Let dry and they will be done.
Web Statistics